
Hello, it’s a great day to start a project.
Renovating your kitchen or bathroom can be a daunting task. However, by entrusting the project to a specialist and by following a few key steps, you can avoid major headaches and ensure a smooth and successful renovation experience.
Renovating your home is a major project that requires a great deal of planning and hard work. In this blog post, I’ll walk you through seven key steps that will pave the way for a successful outcome.
We hope these tips will help you get through the process of defining your objectives, establishing a realistic budget, engaging reliable contractors, and developing a smooth plan. Whether you aspire to make substantial transformations or implement minor enhancements, these guidelines will empower you to turn your dream home into a reality.
If you’re only at the inspiration stage, visit our inspiration section!
Renovations can be costly, but proper planning and budgeting will go a long way to achieving your desired outcome. To establish your budget, follow these important steps.
First, list and prioritize your renovation goals. Decide which changes are most important based on their impact on your lifestyle. Your goals may vary, depending on your specific needs and preferences, but here are a few examples to consider:
Next, research the average cost of the type of renovation you have in mind. Based on this information, draw up a realistic budget that aligns with your financial capabilities. From our experience, we recommend adding a minimum of 20% to 25% as a margin for unforeseen circumstances. The reason for this percentage is simple: renovations often come with unexpected challenges, so it’s wise to be prepared!
Once you’ve established your budget, the key is to stick to it as closely as possible. Look for ways to maximize value for your money throughout the entire process. It’s alright to make minor compromises on temporary decorative elements that can be changed later.
…and an interior designer
Inspiration is key for shaping the overall mood and design of your renovation. Look for inspiration in magazines, on websites, and social media or to gather ideas and immerse yourself in different styles. Visit showrooms to experience the materials firsthand and gain insights into designers’ approaches and pricing.
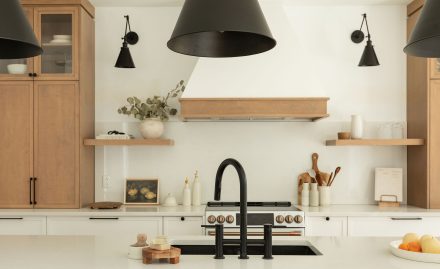
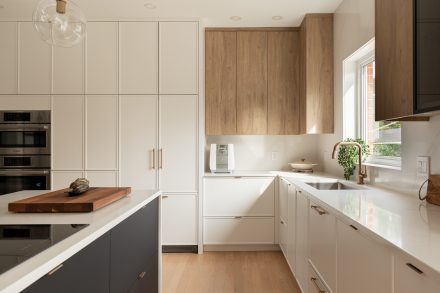
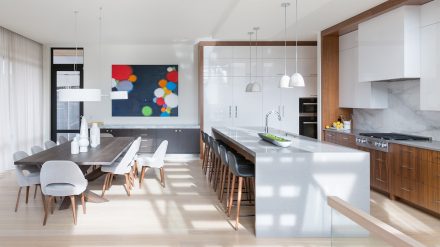
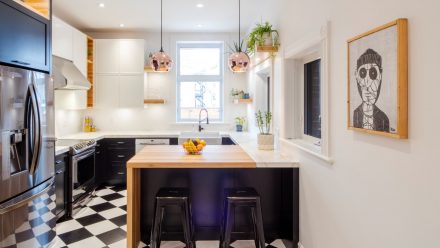
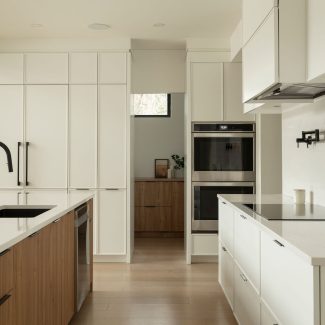
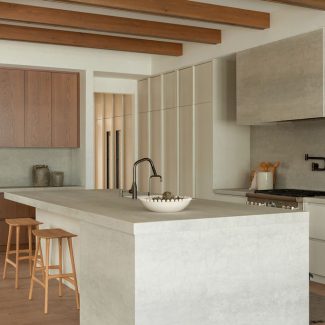
There are countless options for kitchen styles, layouts, and spaces, ranging from classic to farmhouse to modern minimalist.
For example, if you prefer all your appliances and utensils to be stored in cabinets and drawers, an enclosed kitchen with plenty of storage may be just what you’re looking for. Ultimately, the goal is to create an enjoyable and functional living space.
To ignite your inspiration, we meticulously document our projects through captivating photo shoots. You can explore our portfolio of kitchens or follow us on Instagram and TikTok for a continuous source of design ideas.
Collaborating with an interior designer is essential to align your budget and choices. They can provide expert guidance and help you make informed decisions. For instance, one client was fond of her kitchen backsplash and contemplated keeping it while changing the cabinets and countertops. By explaining the costs and pros and cons, she ultimately decided to update the backsplash as well.
Before making a final decision on your materials, it’’s important to consider both functionality and aesthetics to achieve the desired outcome.
Ask yourself:
Taking these factors into account will guide you in exploring suitable options.
Set clear goals to ensure informed decision-making, considering both quality and cost-effectiveness. While renovations can be costly, it’s possible to find affordable solutions without compromising on style and durability.
Don’t be afraid to mix materials and textures that truly reflect your personality, resulting in a personalized and unique space.
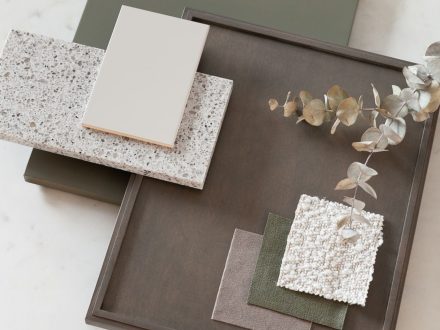
Here are some tried-and-true materials we frequently recommend due to their excellent value and performance over the years. While other options exist, our experience suggests that you’ll find something suitable among these choices.
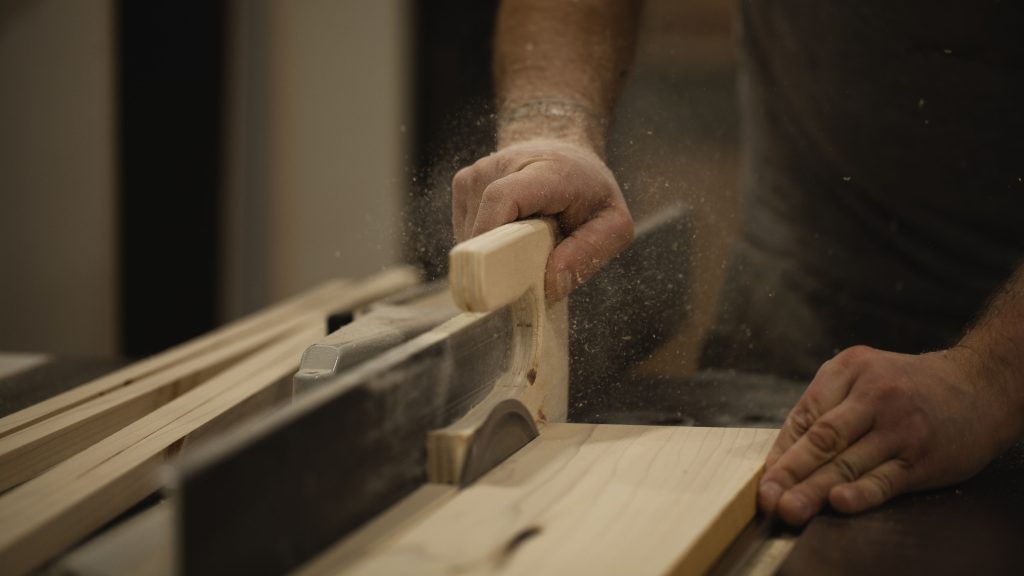
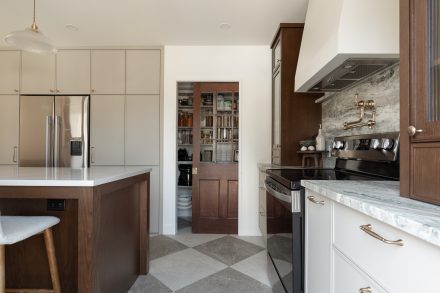
Wood remains the top choice for kitchen cabinets, offering a vast variety of species, colours and styles. Although wooden cabinets tend to be pricier compared to other materials, their longevity with proper care is worth the investment. Moreover, wooden cabinets provide immense design flexibility for kitchen manufacturing, including options like intricate mouldings and turned legs, enabling us to bring your vision to life in a big way!
Laminate, also known as melamine, offers several advantages that make it a popular choice. Not only is it affordable, but it also doesn’t compromise on aesthetics or practicality. These cabinets are highly durable and easy to clean. With a wide range of colours and styles available, you can easily find laminates to complement any kitchen decor. However, it’s crucial to select a reputable company that offers high-quality laminates with impeccable workmanship. Look for thicker edge bands that are machine-glued for long-lasting adhesion, ensuring the durability and longevity of your cabinets.
PET is a synthetic material available in many colours and finishes, including ultra-matte or gloss options. For a trendy and contemporary look, you can opt for 5-piece doors in colours like shaker, providing the desired matte finish we love! Price is not the deciding factor here, as this material is pricier compared to others, especially if you want to prioritize scratch and fingerprint resistance.
Lacquered cabinets are a top choice for their exceptional quality and aesthetic appeal. Crafted with precision, these cabinets offer a wide range of colour options to suit any kitchen design. The glossy finish achieved with lacquer creates a breathtaking final look. To ensure durability, lacquered cabinets are typically made with a base of MDF (medium-density fiberboard), a compressed wood particle material. It’s important to choose a manufacturer that crafts MDF doors in one solid piece to ensure the lacquer remains intact, despite the natural expansion and contraction of wood with changing seasons and temperatures. However, while lacquered cabinets are stunning, they are susceptible to impacts and require careful handling.
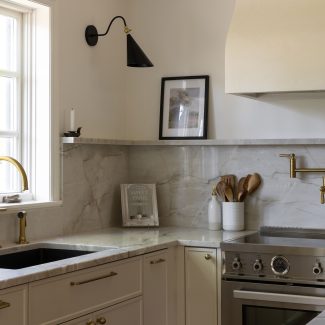
Granite is a popular choice for countertops due to its durability and heat resistance. With a variety of colours and patterns available, it offers versatility in kitchen design. It’s a natural stone, so each slab is unique. Natural stone countertops require minimal maintenance. To preserve the stone’s finish, avoid using harsh, degreasing cleaners. Applying a sealer to the stone helps maintain its integrity over time.
Marble countertops are a favoured option known for their elegance and distinctive veining, adding character to any space. However, marble is a softer stone than granite, making it susceptible to stains and scratches. Regular sealing is necessary to protect its beauty. Embracing the natural aging process of marble and promptly wiping up spills will help maintain its stunning appearance. Choose marble countertops for a sophisticated touch in your kitchen, while understanding the need for proper care and maintenance.
Quartz countertops are man-made using a combination of quartz and other materials such as resin or glass. They are extremely durable and available in a wide range of colours and patterns. With their non-porous nature, quartz countertops are resistant to stains and easy to clean. However, they aren’t resistant to intense heat, so using trivets to protect the surface is essential to keep them in pristine condition.
Dekton countertops have gained popularity due to their exceptional durability and unique manufacturing process. Made from quartz, porcelain, and silica, these materials are pressurized until they melt, resulting in a remarkably strong surface. With Dekton, you can confidently place hot dishes, cut food, and even flambe right on its surface. While the average cost may be higher compared to other materials, the benefits make it well worth the investment. Dekton is available in several thicknesses, making it a compelling choice for Scandinavian or modern styles.
Butcher Block countertops, made by gluing together strips of wood in different ways for different styles, offer a timeless appeal. Some prefer the pristine appearance, while others embrace the natural patina that develops over time from cutting on it. Since wood is porous, it’s imperative to treat your wood countertop with a heavy mineral oil to keep it well saturated and prevent other substances from penetrating its surface.
Laminate countertops are an affordable option made of synthetic material adhered to a compressed wood base. They come in a variety of colours and patterns, allowing you to emulate the appearance of pricier materials such as stone or wood. While laminate countertops may be less durable than other choices, they offer significant cost savings. They are commonly used in laundry rooms, garage storage areas, and secondary bathrooms, where budget-friendly solutions are preferred.
Needless to say, the moodboarding and plan-drawing stage is our favourite part! It’s a cherished moment during the renovation process, brimming with creativity and vision. This is the time when we connect with the essence of the project, allowing our imaginations to take flight.
Each designer has their own unique approach, but let us share with you the Ateliers Jacob approach, which we believe will provide you with a good understanding.
Before starting your project, ensure your designer has a clear understanding of your vision by providing or discussing inspirational images. Ideally, you’ll find yourself in a showroom or other location where you can explore material choices. Take the time to feel and appreciate the different textures, envisioning yourself living surrounded by them. During this stage, your designer should ask you a thousand questions to fully grasp your needs, habits, and priorities.
An experienced designer can provide you with a 3D plan that will give you an excellent preview of your finished space. This representation, based on accurate measurements taken by the designer or their team, should already be accurate. It is often upon these plans that you will finalize your contract with the supplier. Before signing, make sure that the plan fulfills your specific requirements and expectations. While some adjustments may be made during the final phase, this plan serves as the fundamental framework for your project.
Receiving the final plans is an exhilarating moment filled with anticipation! After precise measurements, meticulous contractor discussions, and thoughtful decision-making, everything has come together. This meeting marks the official confirmation of your approval. You may be asked to sign the plans, review samples, or make any necessary contract modifications. With all the details settled, your project can move forward into production, and an estimated installation date can be projected.
This step typically occurs before or after receiving your preliminary plans. It’s important to have a clear project outline before applying for a permit. Although the process can initially seem daunting, a little research and organization will help you gather all the necessary documents efficiently. Start by checking your municipality’s website or contacting them for specific permit requirements.
Next, ensure you have all the required paperwork ready, including plans and contractor contracts. Finally, submit your permit application and promptly pay the associated fees. Keep in mind that permit approvals may take some time, so it’s important to plan ahead and account for possible delays.
Once your plans and permits are approved, the next step involves the manufacturing of custom cabinets or countertops. This process may vary depending on your contractor and supplier, but it’s important to keep in touch with them during this phase to ensure that deadlines align with the work being done.
Depending on your agreement with your designer, either you or your designer will be responsible for following up to ensure that deadlines are met and making any necessary adjustments along the way.
(We can’t stress this enough)
Renovations often come with unexpected difficulties, such as structural damage or fluctuations in material costs. To prepare for these potential obstacles, it’s wise to allocate extra time and budget to accommodate unforeseen problems. As mentioned in Step 1, we always advise our customers to include a 20% to 25% buffer in their budget to allow for maneuvering room.
The same principle applies to deadlines. It’s important not to set a completion date right before a major family event, like welcoming everyone on December 23. Maintain open communication with your contractors and discuss any necessary adjustments to the project plan clearly and transparently.
Tip: It’s worth noting that certain suppliers, including Ateliers Jacob, offer the convenience of having a dedicated designer or project manager to assist you throughout the renovation process. This can be particularly beneficial if you’re not accustomed to directly communicating with the general contractor. Choosing a supplier that provides this additional support can help streamline the communication and coordination of your project, effectively addressing two aspects at once.
To demolish or not to demolish, that is the question. If you’re planning to replace your home’s existing structures, demolition is the way to go. Yes, it can be messy and chaotic, but trust us, the results will undoubtedly make it worthwhile.
The next step after demolition is constructing the framework for new walls and ceilings. The accuracy of the framing will significantly impact the overall appearance of your renovated space, so it’s essential to ensure it’s done right.
Call in your electrician to handle the electrical wiring for your new space. This involves running new wires through the walls and ceiling, and installing sockets and light fittings. Electrical work can be complex, so it’s important to hire a qualified electrician for this task.
Similar to electrical work, plumbing should be completed before proceeding with the other stages of the renovation process. This includes laying new water pipes and installing new plumbing fixtures such as sinks, toilets, and showers. Hiring a qualified professional is vital to ensure the successful execution of this crucial step.
If the exterior walls are affected by your project, insulation is another important step in renovating your home, as it helps keep your space warm in winter and cool in summer. With a variety of insulation options available, make sure to select the one that best suits your needs.
Once the main infrastructure work is complete, it’s time to install drywall throughout your space. Drywall provides a smooth surface for painting or wallpapering and can help soundproof your space. Precise installation is crucial to avoid future issues, so attention to detail is key.
With the drywall in place, it’s time to paint or wallpaper (or both!). This is where you can really start to bring your vision to life by choosing colours and patterns that reflect your style. If you prefer professional assistance, there are experts in painting and wallpapering who can help you achieve your desired look.
Now it’s time to give your space a solid foundation by installing the flooring. With a wide variety of options available, choose the flooring material that fits your needs and budget while enhancing the overall aesthetics of your space.
If you’ve invested time, effort and money in a renovation project, it’s essential to finish it off beautifully with the right finishing touches. This includes installing fixtures, lighting, and accessories that complement your overall design aesthetic. Take the time to carefully select and place these final elements to create a cohesive and polished look. With the finishing touches in place, your renovation project will be beautifully transformed, ready for you to enjoy.
Once all the above steps have been completed, it’s time to carefully inspect all the finished work. Make sure everything meets your expectations and address any remaining concerns. With your approval, the renovation is officially complete, and you can now delight in your newly transformed living space, enjoying the fruits of your labour and the comfort of your updated surroundings.
We sincerely hope that these tips have proven valuable as you contemplate your home renovation. Remember, each project is unique, so if you require further guidance or have specific inquiries, please reach out to us without hesitation.
Our extensive experience of over 35 years in crafting kitchen and bathroom cabinets equips us to assist you in navigating any renovation scenario. Connect with one of our skilled designers today for expert advice tailored to your needs.
Discover Ateliers Jacob cabinets


